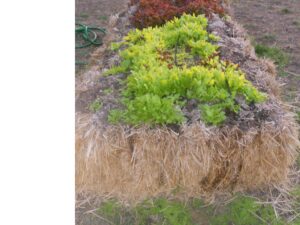
Many of us come to food gardening the hard way, by tearing out lawn, digging hard and unforgiving soil and tilling in compost to create good enough tilth to grow nutritious veggies and fruits. There is an easier way! Try a straw bale garden and while you are growing your dinner be satisfied in knowing you are also preparing soil at the same time. A straw bale garden is literally a bale of straw that has been set on the ground and prepared in such a way as to allow you to grow plants in it. The decomposition process helps to heat the bale, ultimately making a good environment for plant roots. It is also a great way to get crops in while you loosen and amend soil underneath the bale without lifting more than the bale itself when you put it into place. While your garden grows the soil will benefit from organic matter and nutrients as the straw decomposes. A straw bale garden will loosen and amend compacted soil, remove lawn, and identify where your future vegetable garden will be built.
What are the advantages?
- The garden will be more accessible because bales are like a raised bed
- The decomposing straw conditions and amends soil without hard work and warms roots
- Straw that does not decompose at the end of your growing season can be used as mulch on the garden
- It is an inexpensive way to get a garden started
- Can also be placed on concrete areas where you cannot dig up the soil How to build a straw bale garden
What should you consider?
- Place a weed barrier like cardboard, newspaper or burlap on the ground in the area you wish to place the straw bale garden
- You do not need to remove weeds or lawn – unless you are fighting noxious weeds like bindweed, blackberry or knotweed – in which case remove the weeds first
- Consider sun and water access when deciding where to place your garden
- Purchase bales of organic straw – if you cannot find organic supplies ask the vendor if the straw was treated with any herbicides before purchasing – avoid contaminated straw as the herbicide residues can affect your plants
- Choose bales that are tightly bound so they hold together well while you assemble the garden
- Use straw and not HAY! Hay is feed for animals and has many more seeds in it. Straw is the shafts of harvested cereal grains and generally free of weed seeds
How do you create a straw bale garden?
- Arrange the straw bales to fit your space and to match your future garden area
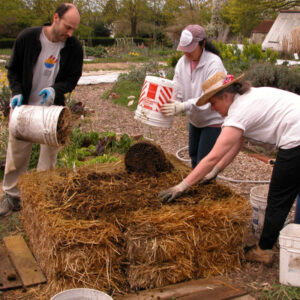
- Set the bales on top of your weed barrier and water thoroughly
- Let sit for three days then add a nitrogen based organic fertilizer to heat up the process – try composted chicken manure, blood meal, or spent coffee grounds as your nitrogen source
- Add compost or loamy topsoil to the top – work into the flakes – top the bale with 6 inches of soil
- Cover with a tarp and let sit for three weeks to allow the composting process to cool down
- Plant into the soil – add more soil to deeper pockets for tomatoes or larger rooted plants – use seedlings that are small enough to ensure coverage of roots with soil
- Space plants appropriately – consider each type of plant’s needs when planting – a pumpkin takes more space than lettuce!
Caring for a straw bale garden
- Check daily for water needs – water if the straw is dry to the touch
- Install drip irrigation if desired to help manage watering
- Use liquid fish fertilizers to water into the bale to add nitrogen throughout the season
- Stake plants as needed – allow squash to tumble off bale onto ground
- Expect the decomposition to change the shape of the bale over time
- Once the garden season is over most bales will be ready for other uses – spread them into garden beds
Call us for more information on sourcing materials to make a straw bale garden.
